

Best TENS Machine for Arthritis (Australia 2026 Guide)
May 29, 2026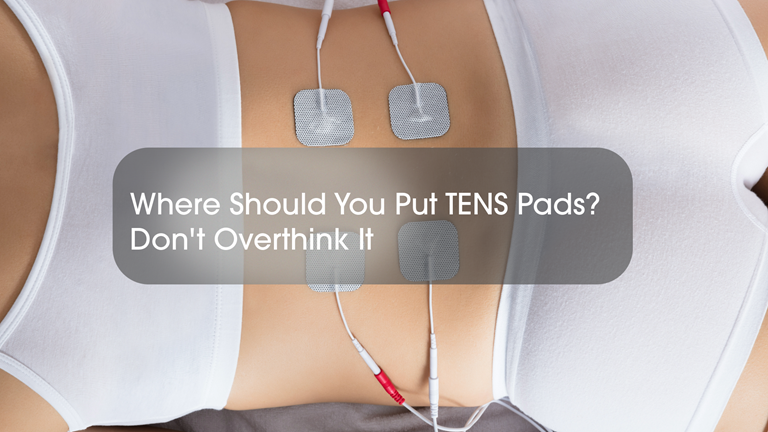
If you’ve ever searched online for where to place TENS pads, you’ve probably discovered plenty of diagrams showing very specific electrode positions.
They can be helpful. But they can also make using a TENS machine seem more complicated than it needs to be.
When TENS is being used for pain management, a useful starting principle is surprisingly simple: place the electrode pads around or near the area where you’re experiencing pain.
You don’t usually need to find one exact spot or position every electrode to the millimetre.
There are important places where TENS electrodes should not be used, and you should always read the warnings and instructions supplied with your TENS machine before treatment. But once you’ve done that, there’s generally room to adjust electrode placement to find the position that works best for you.
Why TENS Pad Placement Matters
A TENS machine – or Transcutaneous Electrical Nerve Stimulation machine – delivers mild electrical impulses through electrodes placed on the skin.
When you’re using TENS for pain management, you generally want those impulses delivered in the region associated with the pain you’re trying to manage.
That’s why you’ll commonly see diagrams with pads positioned either side of a painful area.
But diagrams are a guide, not necessarily a precise map that every person must follow.
All bodies are different.
Pain can be diffuse rather than occurring at one precise point. The area that feels most uncomfortable can also vary from day to day.
So rather than worrying about whether a pad is one or two centimetres away from the position shown in a diagram, think about the broader objective:
You’re trying to comfortably stimulate the area around the pain.
A Simple Starting Point: Surround the Pain
For localised pain, a straightforward approach is to position electrodes around the painful area.
For example, if you are using four electrodes, you might position them so that the painful area sits approximately within a boxed area created by the four pads.
With two electrodes, they may be positioned on either side of the painful area.
The precise position can then be adjusted based on comfort and the sensation you experience.
Don’t Chase the “Perfect” Position
This is where some new TENS users become unnecessarily concerned.
They’ll see an illustration showing an electrode in a particular position and wonder:
“What if mine is slightly higher?”
“What if the pads aren’t perfectly symmetrical?”
“Am I putting them in exactly the right place?”
Provided you’ve read and are following the safety instructions for your device, TENS pad placement generally doesn’t need that degree of precision.
In fact, modestly adjusting the position of the electrodes can be useful.
You may find that moving a pad slightly gives you a more comfortable sensation or better coverage of the area you’re trying to treat.
Think of placement diagrams as starting points rather than targets you have to reproduce perfectly.
What Should TENS Feel Like?
When using TENS for pain management, you will commonly experience a tingling or buzzing sensation beneath and between the electrodes.
The sensation should be strong but comfortable, rather than painful.
If the stimulation feels unpleasant, sharp or uncomfortable, reduce the intensity and check the electrodes and their placement.
You can then make small adjustments if necessary.
There ARE Places You Shouldn’t Put TENS Pads
This is the important distinction.
There’s a big difference between:
“My electrode is 2 cm away from the position shown in the diagram.”
and
“I’m using electrodes somewhere the manufacturer says they shouldn’t be used.”
Before using TENS, always read the contraindications, precautions and electrode-placement warnings supplied with your particular device.
Depending on the device and circumstances, warnings may include avoiding certain areas of the body and use in people with particular implanted electronic devices or medical conditions.
Your device’s instructions should take precedence over any general placement guide you find online – including this one.
If you’re unsure whether TENS is appropriate for you, particularly if you have an implanted medical device, are pregnant, have an underlying medical condition or are using TENS following an injury or procedure, seek advice from an appropriate healthcare professional.
Start Broad, Then Fine-Tune
A simple way to approach TENS pad placement for pain management is:
- Read the safety information first.
- Identify the general area of pain.
- Place the electrodes around or adjacent to that area, consistent with your device instructions.
- Start at a low intensity and gradually increase it to a strong but comfortable sensation.
- Make small adjustments to pad position if necessary to find comfortable coverage. *If you plan to move the pads during a program, be sure to stop / pause the TENS machine before removing the pads.
That’s considerably easier than trying to memorise dozens of electrode diagrams.
Two Pads or Four?
Both can be useful.
Two electrodes can work well when you’re treating a relatively small area.
Four electrodes can provide broader coverage and allow you to effectively surround a larger painful region.
If your TENS machine has two independent channels, four pads may also allow you to treat a larger area or position the electrodes in two pairs.
The important point is that more pads don’t automatically mean better pain relief. Appropriate positioning and comfortable stimulation matter more.
What About Back, Knee, Shoulder and Other Pain?
This is where specific placement guides become useful.
The same general principle applies, but there are practical differences in how you might position electrodes around different parts of the body.
We’ll be covering these individually in our TENS placement series, including:
- TENS pad placement for lower back pain
- TENS pad placement for knee pain
- TENS pad placement for shoulder pain
- TENS pad placement for hip pain
- TENS pad placement for period pain
- TENS pad placement for sciatica
Each guide will show some sensible starting positions, rather than suggesting there is one “perfect” electrode position for everyone.
The Takeaway: Don’t Overthink Your TENS Pad Placement
Correct TENS electrode placement is important – but correct doesn’t necessarily mean exact.
For pain management, a practical starting point is usually to place the electrodes around or near the painful area, following the instructions and safety warnings provided with your device.
From there, small adjustments can help you find a comfortable position that provides good coverage of the area.
So use placement diagrams as a guide.
Read the warnings. Understand where not to place the electrodes. Then don’t be afraid to fine-tune their position.